
Disclosure: This post is for informational and educational purposes only. FinanceCompassPro.com may earn compensation through display advertising. We may also reference third-party products, services, or platforms by name for educational purposes – these mentions are not paid endorsements unless explicitly stated. Nothing in this post constitutes personalized financial, legal, tax, or investment advice.

Building an emergency savings account can feel intimidating when your budget is already stretched. According to the Federal Reserve, only about 54% of U.S. adults have three months of expenses saved for an emergency – which means nearly half of American households are one unexpected bill away from real financial stress.
Most people understand the need for a financial safety net. The hard part is finding extra cash when every dollar already seems spoken for.
But an emergency savings account is one of the most important foundations in personal finance. It gives every other financial goal a stable base to stand on.
Without one, a single unexpected expense – a car repair, a medical bill, a job loss – can derail months or years of progress. With one, the same event becomes an inconvenience rather than a crisis.
This guide breaks down exactly how to build an emergency savings account from scratch, including how much you actually need, where to keep it, and how to make progress even when you have very little to start with.
What Is an Emergency Savings Account?
An emergency savings account is a dedicated cash reserve set aside specifically for unexpected, necessary expenses. It is not for vacations, not for planned purchases, and not for investments.
It exists for one purpose: to cover genuine financial emergencies without forcing you into high-interest debt or requiring you to sell investments at the wrong time.
Common emergencies that may warrant drawing from this account include:
- Job loss or reduction in income
- Major car repair, not routine maintenance you could have planned for
- Unexpected medical or dental expenses
- Home repair that cannot wait, such as heating failure or a roof leak
- Family emergency requiring travel
The key word is “unexpected.” If you know the expense is coming, it belongs in a separate sinking fund or short-term savings goal, not your emergency reserve.
How Much Do You Actually Need?
The standard advice is three to six months of essential expenses. That range is wide by design. The right target depends on your income stability, household structure, fixed expenses, and how quickly you could recover from an income disruption.
You may be closer to a three-month target if:
- You have a stable job with steady income
- Your household has two incomes
- You have low fixed expenses
- You work in a field with strong job demand
You may need closer to six months, or more, if:
- You are self-employed or have variable income
- You are the sole income earner in your household
- You have dependents relying on your income
- Your field has limited job opportunities or long hiring timelines
- You have significant fixed obligations, such as a mortgage or recurring medical costs
Start by calculating your essential monthly expenses – rent or mortgage, utilities, groceries, minimum debt payments, insurance, and transportation. That number is your baseline monthly survival cost. Multiply it by three or six to get your target range.
Do not calculate your emergency fund based on your full lifestyle spending. Calculate it based on what you truly need to survive a financial disruption.

Where to Keep an Emergency Fund
Your emergency savings account should be:
- Liquid – accessible within a few business days without penalty
- Separate – not mixed with your everyday checking account
- Safe – not subject to stock market fluctuation
- Earning something – ideally earning a competitive yield without taking market risk
For many people, the right account type is a high-yield savings account at an FDIC-insured bank or NCUA-insured credit union. If you are comparing where to keep your emergency cash, our guide to high-yield savings accounts vs. regular savings accounts explains how much the interest difference can add up over time.
Online high-yield savings accounts often offer higher interest rates than traditional bank savings accounts while still providing FDIC or NCUA insurance when held at an eligible institution. Rates change frequently, so compare current offers before opening an account.
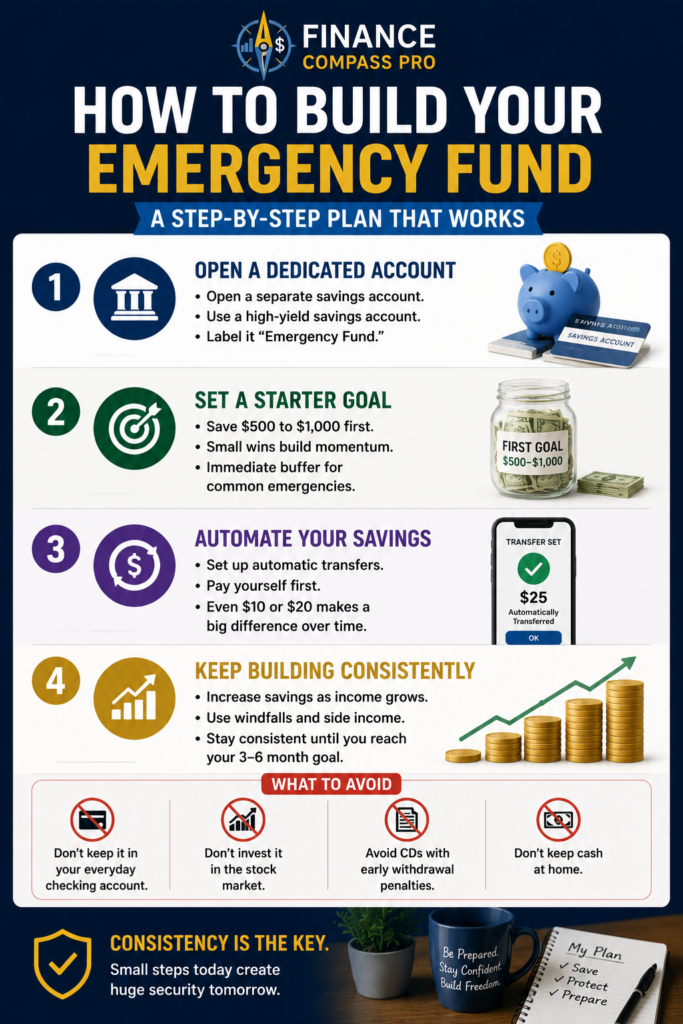
What to avoid:
- Your everyday checking account, because it is too easy to spend accidentally
- A brokerage account, because emergency cash should not be exposed to market risk
- CDs with early withdrawal penalties, because they reduce liquidity
- Cash at home, because it earns nothing and creates security risk
For investor education on savings and financial products, see the FDIC consumer resources page.
How to Build It: A Step-by-Step Plan
You do not need to build the full fund overnight. The goal is to create a system that moves you forward one small step at a time.
Step 1: Open a Dedicated Account
Before you worry about the full target, open a separate savings account specifically designated as your emergency fund. If your bank allows account labels, name it “Emergency Fund” or “Do Not Touch.”
The separate account creates psychological distance between your emergency reserve and your spending money. That friction is useful because it makes you think twice before moving the money.
For many people, a high-yield savings account can be a practical place to keep emergency cash because it keeps the money accessible while allowing it to earn interest.
Step 2: Set an Immediate Starter Goal
Do not start by trying to save three months of expenses. Start by trying to save $500 or $1,000.
A small, achievable first target does two things. It gives you an early win that builds momentum, and it provides immediate protection against the most common minor emergencies, such as car repairs or small medical bills. Once you hit $1,000, raise the target. Then raise it again.
Step 3: Automate a Weekly or Monthly Transfer
Automation is one of the most effective habits for building savings consistently. Set up a recurring automatic transfer from your checking account to your emergency savings account, even if it is a small amount.
- $25 per week becomes $1,300 per year
- $50 per week becomes $2,600 per year
The amount matters less than the consistency at the beginning. Choose a transfer amount that will not overdraft your checking account, then leave it running.
Step 4: Direct Windfalls to the Account
Tax refunds, work bonuses, birthday money, cash gifts, and other unexpected income can accelerate emergency fund growth. When a windfall arrives, transfer a meaningful portion directly to your emergency savings account before it gets absorbed into everyday spending. Even sending half can move your fund forward faster than relying only on weekly transfers.
Step 5: Find One Recurring Expense to Reduce
Look through your last 30 days of bank and credit card statements. Identify one subscription, service, or recurring expense you can reduce or pause temporarily. Redirect that exact amount to your emergency fund.
Even cutting a streaming service for two months can add $20 to $30.
If finding extra savings capacity is the hard part, our guide on how to build a simple budget that actually works can help you locate money already moving through your monthly cash flow.
Step 6: Set the Full Target and Track It
Once your starter emergency fund is in place, calculate your full target based on three to six months of essential expenses. Track your progress monthly.
Visibility matters. Seeing the number grow, even slowly, reinforces the habit and makes it easier to keep going.
If you are trying to balance emergency savings with debt payoff, retirement contributions, and other priorities, see our guide on how to set financial goals before you invest.
Emergency Fund and Your Investment Strategy
A funded emergency savings account changes your investment strategy in an important way: it protects your investments from real-life disruptions.
Without an emergency fund, unexpected expenses can force people to sell investments at the worst possible moments – often during market downturns when assets are temporarily depressed. With an emergency fund in place, you can let your investments compound without interruption.
A common sequence for many beginners looks like this:
- Build a starter emergency fund of $500 to $1,000
- Pay off high-interest debt, such as credit cards or payday loans
- Capture your 401(k) employer match, if available
- Build a full emergency fund of three to six months of essential expenses
- Max out a Roth IRA or continue 401(k) contributions, depending on your goals
- Move toward additional investing and savings goals
This sequence is not universal, but it reflects a common balance: get a small cash buffer first, eliminate the most expensive debt, then capture the employer match before building the full emergency fund. The employer match is included early because, when available and vested, it can represent an immediate return that pausing contributions may forfeit.
For more on how the employer match fits into this sequence, see our guide on what is a 401(k) employer match.
For a complete beginner investing framework, see our guide on investing for beginners.
What If You Have Almost Nothing to Start With?
If your budget is very tight, the standard advice can feel impossible. You can still make progress by changing the size of the first step.
Start with $5 or $10. The habit matters more than the amount at the beginning. Opening the account and making the first transfer, no matter how small, is the most important step.
Use found money. Sell something you no longer need. Complete a small freelance task. Return an item you have not used. Direct that money to the account.
Reduce one expense temporarily. Even cutting a streaming service for two months can add $20 to $30 to the account. This does not have to be permanent.
Look for one small income boost. This could be an extra shift, a one-time freelance task, selling unused items, or asking for a raise if that is realistic in your role.
The goal is not perfection. It is forward motion. Saving $25 this month is better than saving $0 while waiting until you can save $500.
How to Use Your Emergency Fund and Rebuild It
When a genuine emergency hits, use the fund without guilt. That is exactly what it is for.
After drawing on it, make replenishing the fund one of your next financial priorities. Temporarily increase your automatic transfer amount, redirect windfalls, or pause lower-priority goals until the account is rebuilt.
An emergency fund is not meant to stay untouched forever. It is meant to protect you, be used when necessary, and then be rebuilt.
The Bottom Line
Once your emergency fund is in place, the next question is often when it’s actually complete enough to start investing alongside it – see How Much Cash Should You Keep Before You Start Investing? Pairing your emergency fund with a clear budgeting method also makes it even easier to protect. Zero-based budgeting is one of the most effective ways to make your monthly emergency fund contribution a non-negotiable line item – giving every dollar a specific job before the month begins.
An emergency savings account is not a luxury. It is the financial foundation that makes everything else possible: consistent investing, stable retirement contributions, and the ability to take reasonable risks without being vulnerable to a single bad month.
Start with a goal of $500 or $1,000. Open a separate savings account. Set up an automatic transfer, no matter how small. Build from there.
The right time to build an emergency fund was before you needed it. The second best time is now.
Disclaimer: This article is for educational purposes only and does not constitute personalized financial or investment advice. Interest rates, account terms, and financial products vary and change over time. Consult a qualified financial professional for advice specific to your situation.